Here is a full recipe article for Chocolate Peanut Butter Crunch Bars — written like something you’d find in a cozy food blog or magazine. It’s warm, encouraging, and packed with all the tips you need to succeed.
Chocolate Peanut Butter Crunch Bars
*No-bake, 6 ingredients, and dangerously delicious*
Why You’ll Love These Bars
Let me tell you about a dessert that has saved me more times than I can count.
It’s the day before the school bake sale. Or your in-laws just called to say they’re stopping by in an hour. Or it’s 9 p.m. and you need something sweet — right now.
These Chocolate Peanut Butter Crunch Bars are the answer.
They’re no-bake. They use only 6 ingredients. And they come together in about 15 minutes of active time.
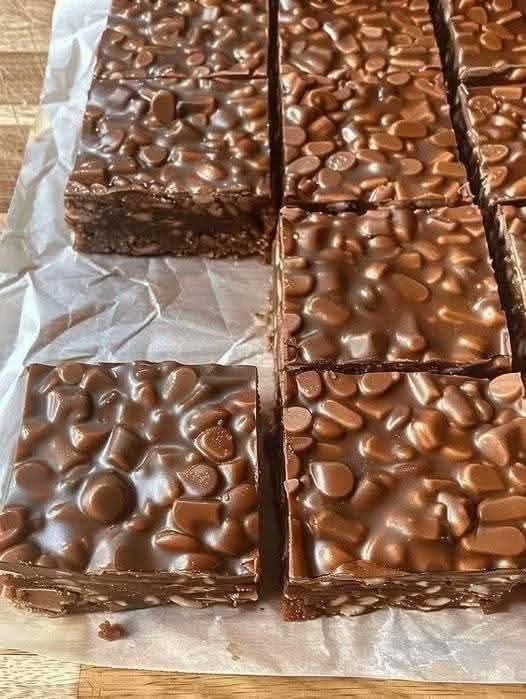
The base is peanut buttery and slightly salty. The top is smooth, dark chocolate. And the whole thing is filled with little crispy rice bubbles that give every bite a delightful crunch.
They taste like a fancy candy bar — but you made them. In your own kitchen. With no oven.
The Story Behind These Bars
I first made these bars when I was craving a peanut butter cup but wanted something with more texture. You know that feeling? When you want creamy and crunchy at the same time?
My grandmother used to make something similar during the holidays. She’d press them into an old glass pan, chill them on the back porch (this was before everyone had a big refrigerator), and slice them into perfect little squares.
She called them “pantry bars” because she always had the ingredients in her pantry.
And that’s the beauty of this recipe. You probably already have everything you need.
🧾 What You Need
(Makes 16–20 bars, depending on how you cut them)
For the Peanut Butter Crunch Layer
-
1 cup creamy peanut butter — the regular kind, not natural (natural separates)
-
½ cup honey (or light corn syrup)
-
½ cup brown sugar — packed tight
-
3 cups crispy rice cereal — like Rice Krispies
For the Chocolate Topping
-
1 ½ cups semi-sweet chocolate chips
-
2 tablespoons coconut oil (or butter)
Optional Toppings
-
Flaky sea salt — for sprinkling on top
-
Crushed peanuts — for extra crunch
👩🍳 How to Make Them
Step 1: Prepare your pan
Line an 8×8-inch or 9×9-inch square pan with parchment paper. Leave some overhang on two sides — this makes it easy to lift the bars out later.
If you don’t have parchment paper, grease the pan well with butter or cooking spray.
Step 2: Make the peanut butter crunch layer
In a large saucepan over medium-low heat, combine:
-
Peanut butter
-
Honey
-
Brown sugar
Stir constantly until everything is melted and smooth — about 3–4 minutes.
Don’t let it boil. Just warm and stir.
Take the pan off the heat.
Pour in the crispy rice cereal.
Stir gently until every little piece of cereal is coated in that golden peanut butter mixture.
Step 3: Press into the pan
Scrape the mixture into your prepared pan.
Spread it out evenly.
Here’s a trick: Press it down firmly with a spatula or the back of a spoon.
Really press. This keeps the bars from falling apart when you cut them.
Set the pan aside while you make the chocolate topping.
Step 4: Make the chocolate topping
In a microwave-safe bowl, combine:
-
Chocolate chips
-
Coconut oil (or butter)
Microwave in 20-second bursts, stirring each time, until smooth and melted.
This usually takes about 1 minute total.
Step 5: Top and chill
Pour the melted chocolate over the peanut butter layer.
Spread it evenly with a spatula — right to the edges.
If you want to be fancy, sprinkle flaky sea salt or crushed peanuts on top right away.
Put the pan in the refrigerator for at least 2 hours — until the chocolate is completely firm.
Step 6: Cut and enjoy!
Lift the whole block out of the pan using the parchment paper overhang.
Place it on a cutting board.
Use a sharp knife to cut into squares or bars.
Wipe the knife clean between cuts for pretty edges.
Serve cold or at room temperature.
🍴 How to Eat Them
-
Cold from the fridge — the chocolate is snappy
-
At room temperature — the peanut butter layer gets softer
-
With a glass of cold milk
-
Crumbled over ice cream
-
Hidden in the freezer for emergencies (we all have those)
🔄 Easy Swaps
| Swap | How |
|---|---|
| Different nut butter | Almond butter or cashew butter works great |
| No honey? | Use maple syrup or light corn syrup |
| Dark chocolate | Use dark chocolate chips for less sweetness |
| Milk chocolate | Use milk chocolate chips for sweeter bars |
| Gluten-free | Most rice cereal is naturally gluten-free — check the box |
| Vegan | Use maple syrup instead of honey + vegan chocolate chips |
❓ Questions You Might Have
Q: Why can’t I use natural peanut butter?
Natural peanut butter has oil that separates. The bars can turn out greasy and crumbly. Regular peanut butter (like Jif or Skippy) works best.
Q: My bars are falling apart. What happened?
You probably didn’t press the mixture firmly enough. Next time, press really hard! Also make sure you didn’t skip the honey or sugar — they’re the glue.
Q: Can I use fresh crispy rice cereal (not from a box)?
The boxed cereal is best — it’s already super crunchy and dry.
Q: How long do these last?
In the fridge: up to 2 weeks in a sealed container.
On the counter: 3–4 days (but the chocolate may get soft).
In the freezer: up to 3 months.
Q: Can I double the recipe?
Yes! Use a 9×13-inch pan. The layers will be a little thicker, so add 30 minutes to the chilling time.
Q: My chocolate topping is cracking when I cut. How do I fix it?
Let the bars sit at room temperature for 10 minutes before cutting. Warm your knife under hot water and dry it before each slice.
🪄 Pro Tips for Perfect Bars
| Tip | Why |
|---|---|
| Press firmly | Keeps bars from falling apart |
| Use regular peanut butter | Natural doesn’t hold together |
| Don’t overheat the peanut butter mixture | High heat makes the bars greasy |
| Let the peanut butter layer cool slightly before adding chocolate | Keeps the layers separate |
| Cut cold, serve at room temperature | Best of both textures |
📦 Storing & Gifting
These bars make wonderful homemade gifts.
To gift:
Cut into bars and stack them in a tin lined with wax paper. Tie with a ribbon. Add a little note: “Made in my kitchen — with extra crunch.”
To store long-term:
Freeze in a single layer, then transfer to a bag. Thaw in the fridge before serving.