Here is a full recipe article for Sticky Brown Sugar Kielbasa Bites — the perfect sweet, savory, and irresistible appetizer.
Sticky Brown Sugar Kielbasa Bites
Sweet, sticky, savory, and gone in 5 minutes — the appetizer everyone begs for
Why You’ll Love These Bites
Let me tell you about an appetizer that has never, ever failed me.
It’s the party where nobody touches the veggie tray. The game day spread where the fancy dip gets ignored. The holiday gathering where people hover around the slow cooker like vultures.
These Sticky Brown Sugar Kielbasa Bites are that appetizer.
They’re sweet. They’re savory. They’re sticky and glossy and caramelized. The outside is coated in a brown sugar glaze that crackles when you bite into it. The inside is smoky, juicy, and perfectly salty.
And the best part?
Only 4 ingredients. One pan. 15 minutes.
🧾 What You Need
(Serves 6–8 as an appetizer — or 4 hungry people who skip dinner)
The 4 Main Ingredients
-
1 ring (14 oz) fully cooked kielbasa sausage (or any smoked sausage)
-
½ cup brown sugar (packed tight)
-
2 tablespoons butter
-
1 tablespoon Dijon mustard (or yellow mustard)
Optional (But So Good)
-
¼ teaspoon red pepper flakes — for a little heat
-
¼ teaspoon garlic powder
-
1 tablespoon apple cider vinegar — for a tiny tang
-
Fresh parsley or green onions — for garnish
-
Sesame seeds — for crunch and pretty
👩🍳 How to Make Them
Step 1: Prep the kielbasa
Cut the kielbasa into bite-sized rounds — about ½ inch thick.
You’ll get about 30–40 little coins.
Pro tip: Cut them on a slight diagonal for a more “fancy” look.
Step 2: Make the sticky glaze
In a large skillet over medium heat, melt the butter.
Add the brown sugar, mustard, and any optional ingredients you’re using (red pepper flakes, garlic powder, vinegar).
Stir until the sugar dissolves and the mixture starts to bubble — about 2 minutes.
Step 3: Add the kielbasa
Toss the kielbasa rounds into the skillet.
Stir to coat every piece in that golden, sticky glaze.
Step 4: Cook until sticky
Let the kielbasa cook for 5–7 minutes, stirring occasionally.
The glaze will thicken, darken, and turn into a glossy, sticky coating on the sausage.
The edges of the kielbasa will get a little caramelized and crispy — that’s the best part.
Step 5: Serve hot
Transfer the sticky, glossy bites to a serving plate.
Sprinkle with parsley, green onions, or sesame seeds if you want to be fancy.
Put out some toothpicks — because people will grab these with their hands.
🍴 How to Eat Them
-
On toothpicks — perfect for parties
-
Over rice — makes a quick dinner
-
Alongside scrambled eggs — for a sweet and savory breakfast
-
Straight from the skillet — no judgment here
🔄 Easy Swaps
| Swap | How |
|---|---|
| Different sausage | Use smoked sausage, andouille, or even hot dogs |
| No mustard? | Use 1 tablespoon soy sauce or Worcestershire |
| Add pineapple | Toss in 1 cup pineapple chunks at the end |
| Spicy version | Add ½ teaspoon cayenne or sriracha |
| Bacon version | Add ¼ cup crumbled cooked bacon at the end |
| Slow cooker method | Cook on LOW for 2 hours, then uncover and cook on HIGH for 30 minutes to thicken |
❓ Questions You Might Have
Q: Can I make these in the oven?
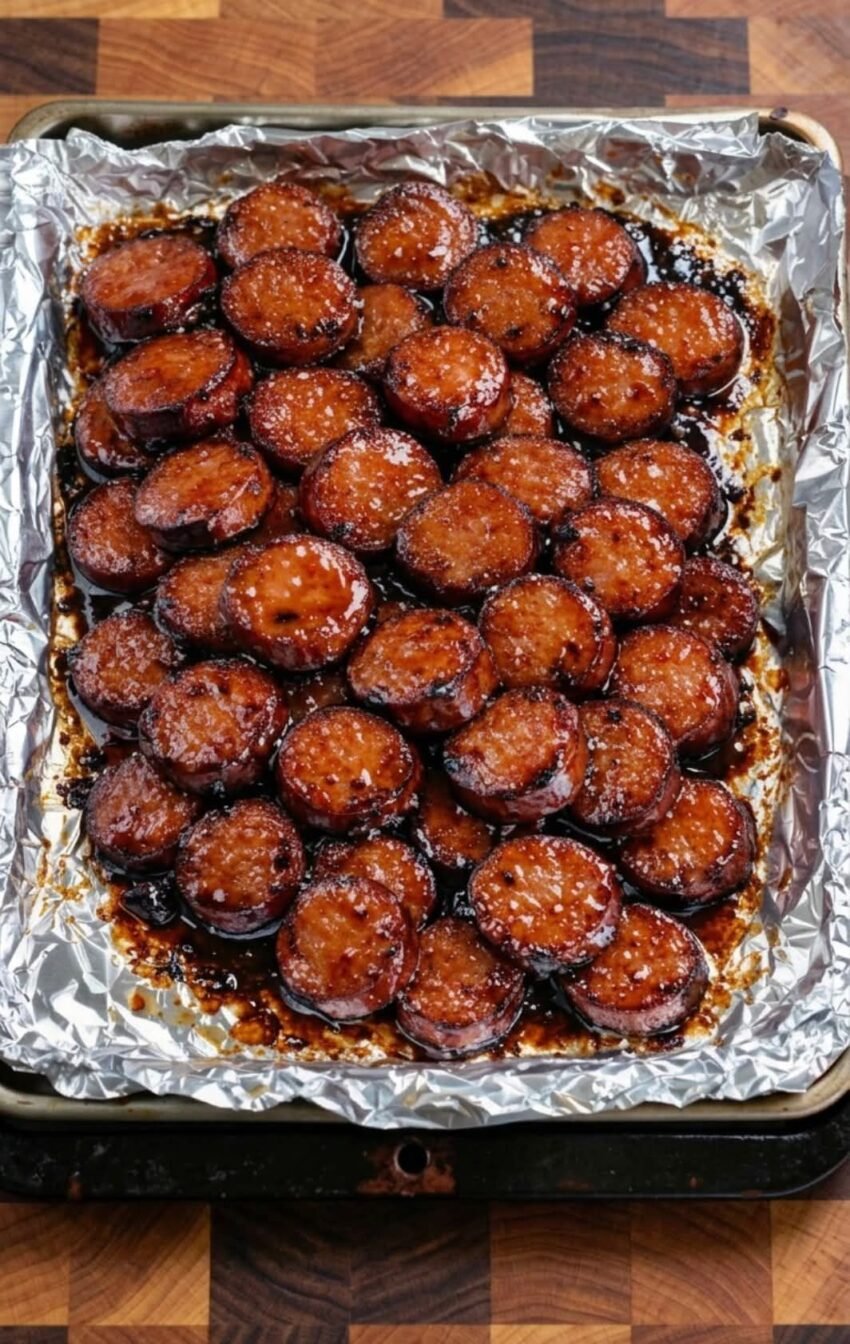
Yes! Toss the kielbasa in the glaze, spread on a baking sheet, and bake at 400°F for 12–15 minutes until sticky and caramelized.
Q: Can I make these in an air fryer?
Absolutely! Toss in the glaze, air fry at 375°F for 8–10 minutes, shaking halfway through.
Q: Why isn’t my glaze getting sticky?
Pat the kielbasa dry before adding it to the pan — extra moisture prevents the glaze from thickening. Also, give it time! The sugar needs a few minutes to caramelize.
Q: Can I double the recipe?
Yes! Use a larger skillet or cook in batches. Don’t crowd the pan or the kielbasa will steam instead of getting sticky and caramelized.
Q: Can I make these ahead of time?
They’re best fresh and hot. But you can reheat them in a skillet, oven, or air fryer — they’ll get sticky again!
Q: How long do leftovers last?
In the fridge: 3–4 days in a sealed container. Reheat in a skillet or microwave.
🪄 Pro Tips for Perfect Sticky Bites
| Tip | Why |
|---|---|
| Pat the kielbasa dry | Helps the glaze stick and caramelize |
| Use a nonstick skillet | Makes cleanup so much easier |
| Don’t crowd the pan | Too much sausage = steaming, not caramelizing |
| Let the glaze bubble | That’s how it gets thick and sticky |
| Serve warm | The glaze hardens as it cools |
📦 Storing & Reheating
-
In the fridge: Keep in a sealed container for 3–4 days
-
To reheat: Skillet over medium heat for 3–4 minutes, or microwave for 30–60 seconds
-
Freeze? The texture changes slightly, but they still taste great — freeze for up to 2 months
A Final Word From My Kitchen to Yours
These Sticky Brown Sugar Kielbasa Bites are proof that the best recipes are also the simplest.
Four ingredients. One skillet. Fifteen minutes. And a plate of sticky, sweet, savory bites that disappear faster than you can make them.
I’ve brought these to potlucks, holiday parties, and game day gatherings. I’ve made them for hungry kids after school and for friends who “just stopped by.”
Every single time, the plate comes back empty. Every single time, someone asks for the recipe.
So next time you need an appetizer that will impress without stressing you out — make these.
Your people will thank you.
You did it!
Sticky, sweet, savory kielbasa bites that everyone loves.
Now go grab one before they’re all gone!